How to make a wedding seating chart, step by step
A seating chart feels like a puzzle with a hundred moving pieces. It gets much easier when you do it in the right order: the final numbers first, the important tables next, and everyone else group by group.
When to start your seating chart
Start a rough draft as soon as most RSVPs are in, then finish it once your RSVP deadline has passed. Many venues and caterers ask for final numbers and table assignments around one to two weeks before the wedding, so check that date with them and work back from it.
A first draft early on is still worth it: it shows you quickly whether your room and table sizes work for your guest count, while there is still time to change them.
The 8 steps
1. Lock in your final guest list
Work only from people who said yes. Then add the people who are easy to forget:
- plus-ones, with their names if you know them;
- children who need a seat (and high chairs for babies);
- vendors who will eat during the reception, such as the photographer or the band, if your caterer seats them;
- the officiant, if they are staying for dinner.
2. Sort your guests into groups
Before thinking about tables, label every guest with a group: “Bride's family”, “Groom's college friends”, “Work”, “Neighbors” and so on. Keep households and couples together from the start. Groups are what make the rest of the job fast, because most tables end up being one group, or two groups that will get along.
Tip: add each guest's meal choice and any allergy at this stage too. You will need it per table for the caterer later, and it is much easier to collect once than to look up twice.
3. Get the room and the tables from your venue
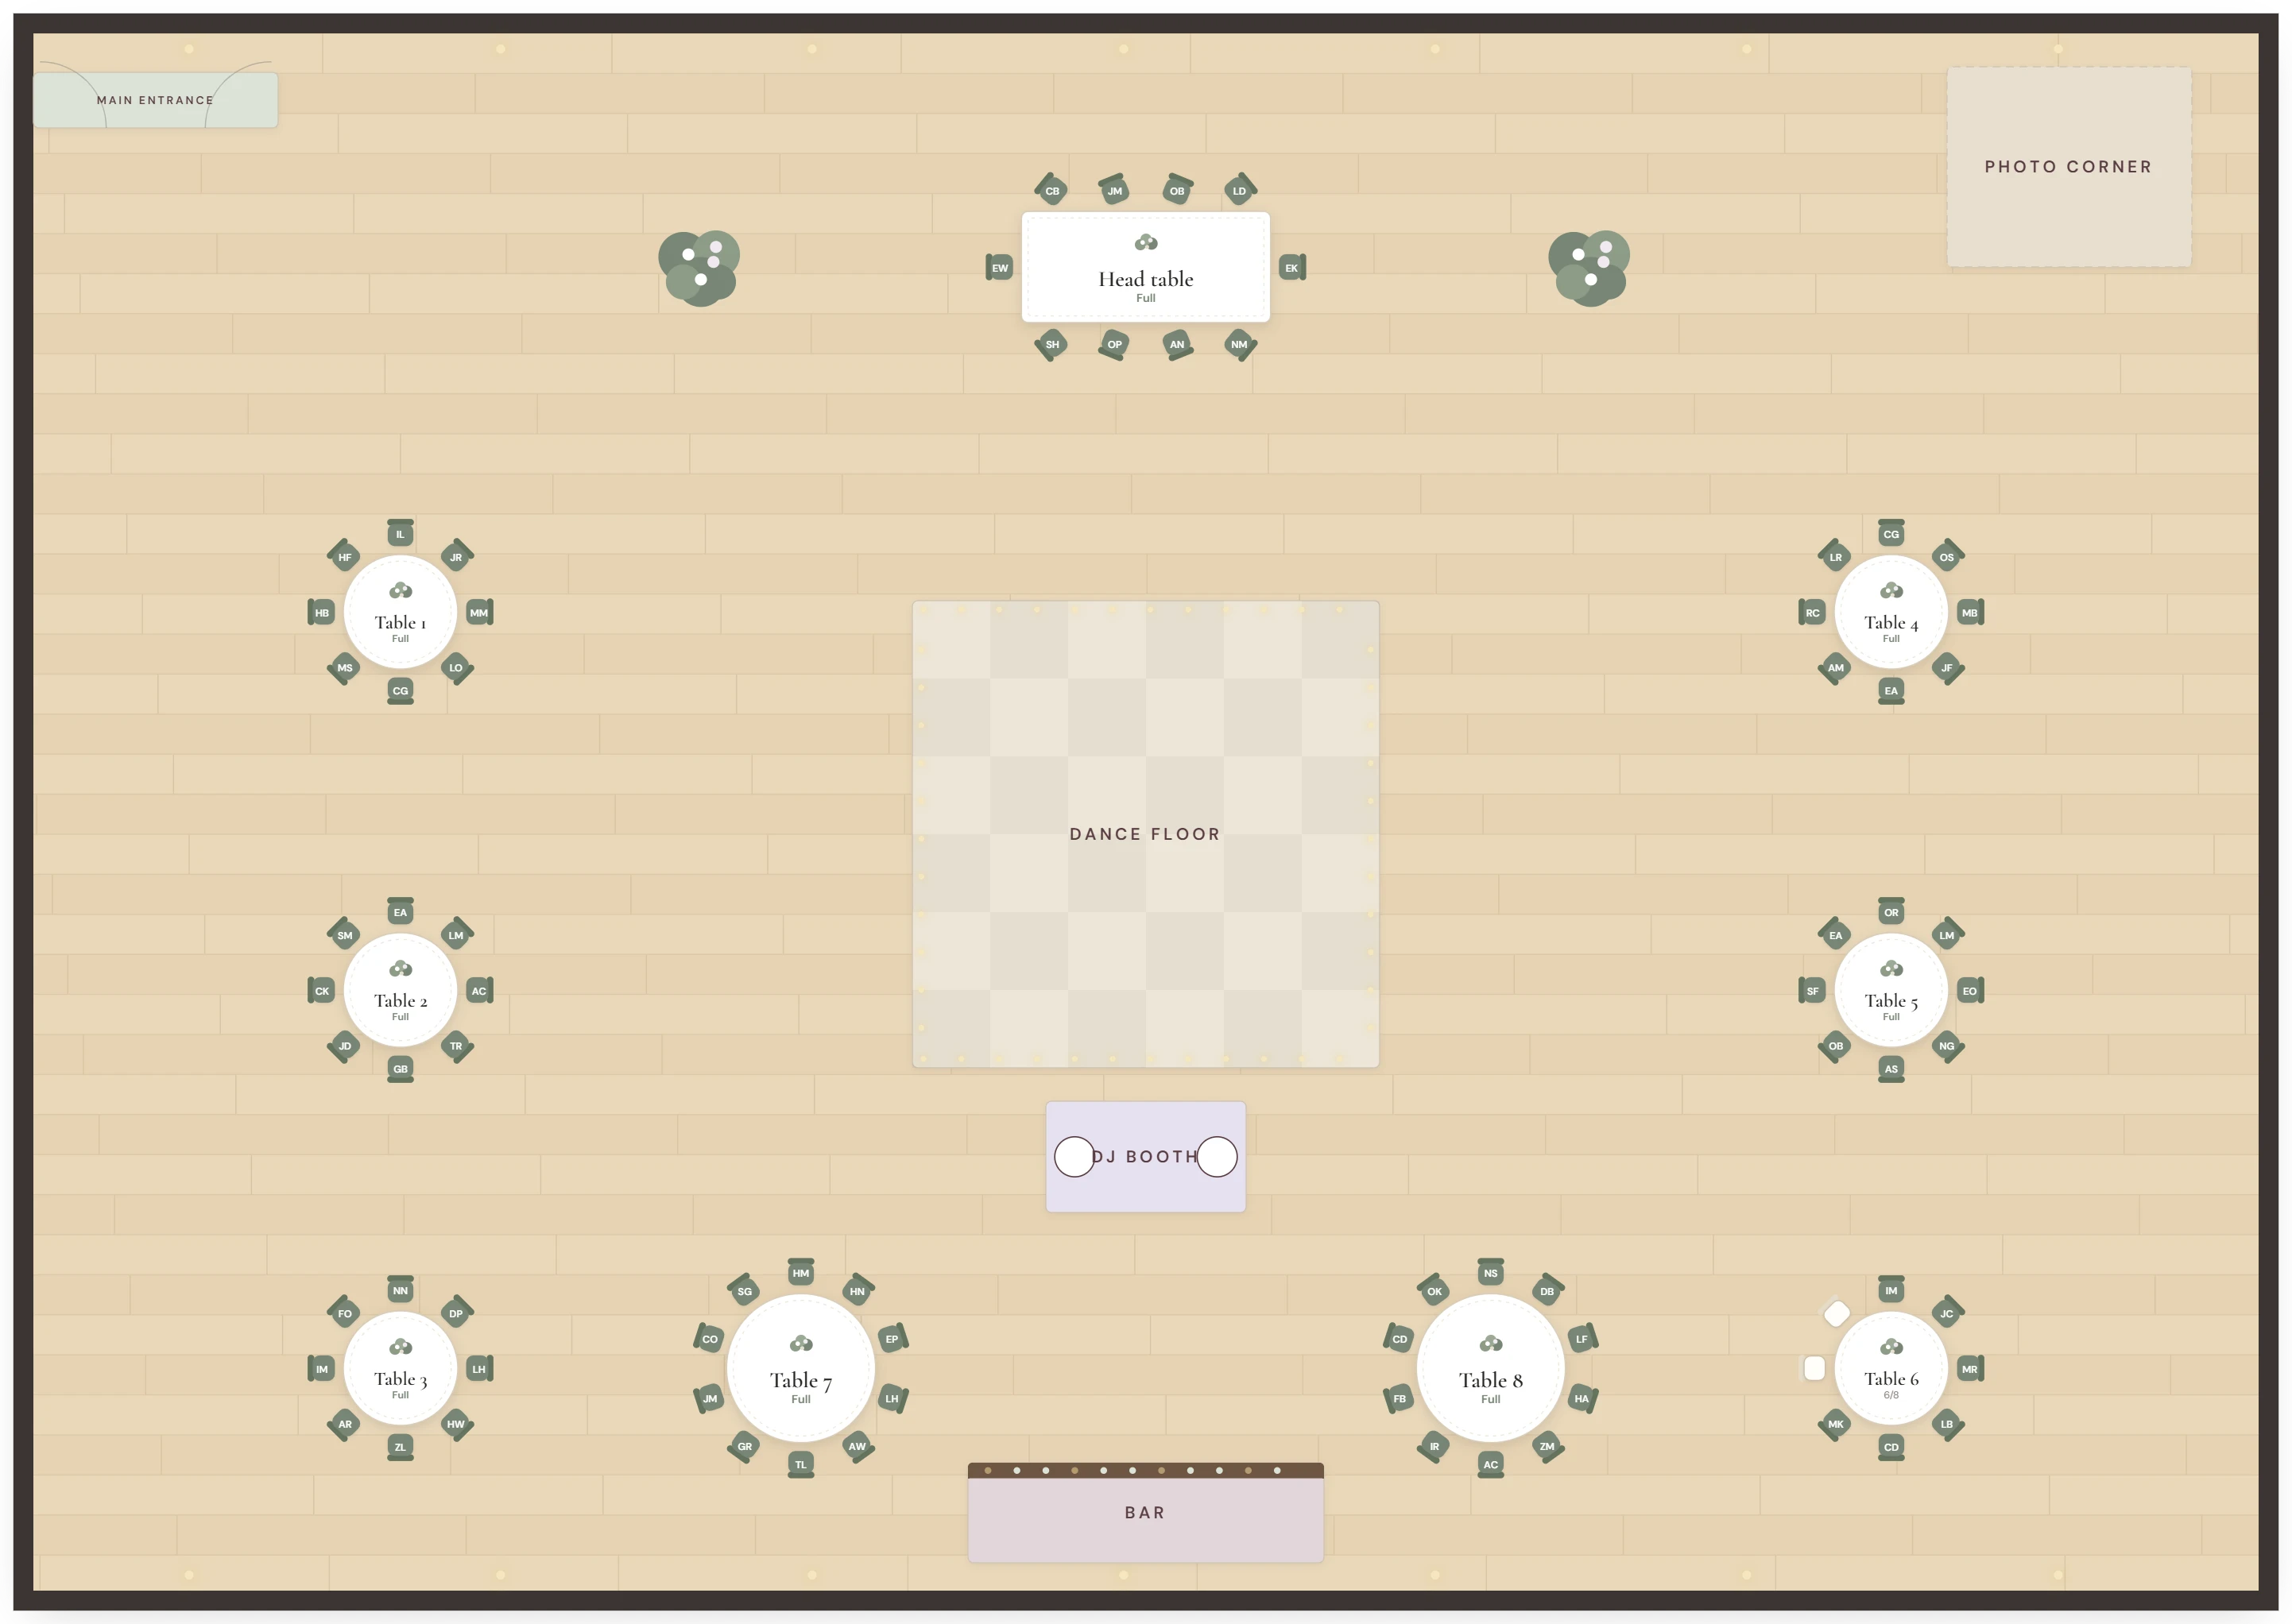
Ask your venue for a floor plan with the room's dimensions, where fixed things are (doors, columns, the bar, the stage) and which table sizes they have. Whether you use rounds of 8 or 10, rectangular tables or long banquet rows changes how many tables you need. Our guide to round vs rectangular tables has a capacity chart for every common size.
Divide your guest count by the seats per table, round up, and add one spare table's worth of seats if the room allows. Late changes happen.
4. Place the anchor tables first
Some tables decide where everything else goes, so place them before anyone else:
- Your table: a head table, a sweetheart table for the two of you, or a family table. It usually faces the room, with a clear view of the dance floor.
- Parents and grandparents: close to your table. Grandparents do best away from the speakers and near the restrooms.
- Guests who need easy access: wheelchair users, guests with walkers, and pregnant guests, near an entrance and with space around the chair.
5. Fill the remaining tables group by group
Take your largest group and fill whole tables with it. Then move to the next group. When a group does not fill a table exactly, combine it with a group that has something in common: similar age, the same city, the same interests. Groups that will dance all night can go near the dance floor; groups with small children are happier a little further from the speakers.
6. Solve the tricky cases
Divorced parents, a plus-one who knows nobody, a single friend, the kids' table, relatives who don't get along: every wedding has a few of these. Handle them one at a time once the easy tables are done. Our wedding seating etiquette guide has a tactful answer for each one.
7. Check meals and dietary needs table by table
Go through each table and count its meals: how many fish, how many vegetarian, which guest has a nut allergy. Servers need this per table, not just as a total for the whole wedding, so the right plate reaches the right person.
8. Review it, then print
Look at the chart from a guest's point of view. Does everyone know at least one person at their table? Is anyone seated with their back to your table during the speeches? Is the path from the door to every table clear? Then print the documents described below.
Common mistakes to avoid
- Starting before the RSVPs are in. You will rebuild the chart several times. Draft early if you like, but finish late.
- Splitting couples and households. Guests almost always expect to sit with the person they came with.
- Filling every seat to the maximum. A round of 10 with 10 people is tight. Leaving a seat free at a few tables gives you room for last-minute changes.
- Forgetting about the room. A table that looks fine on paper may block a door, sit right under a speaker, or have no view of the toasts.
- Keeping the meal choices in a separate list. When the chart and the meals live in different places, they stop matching after the first change.
What to print for your venue
Most receptions use three documents:
- The floor plan, for the venue staff and coordinator: where each table goes and its number.
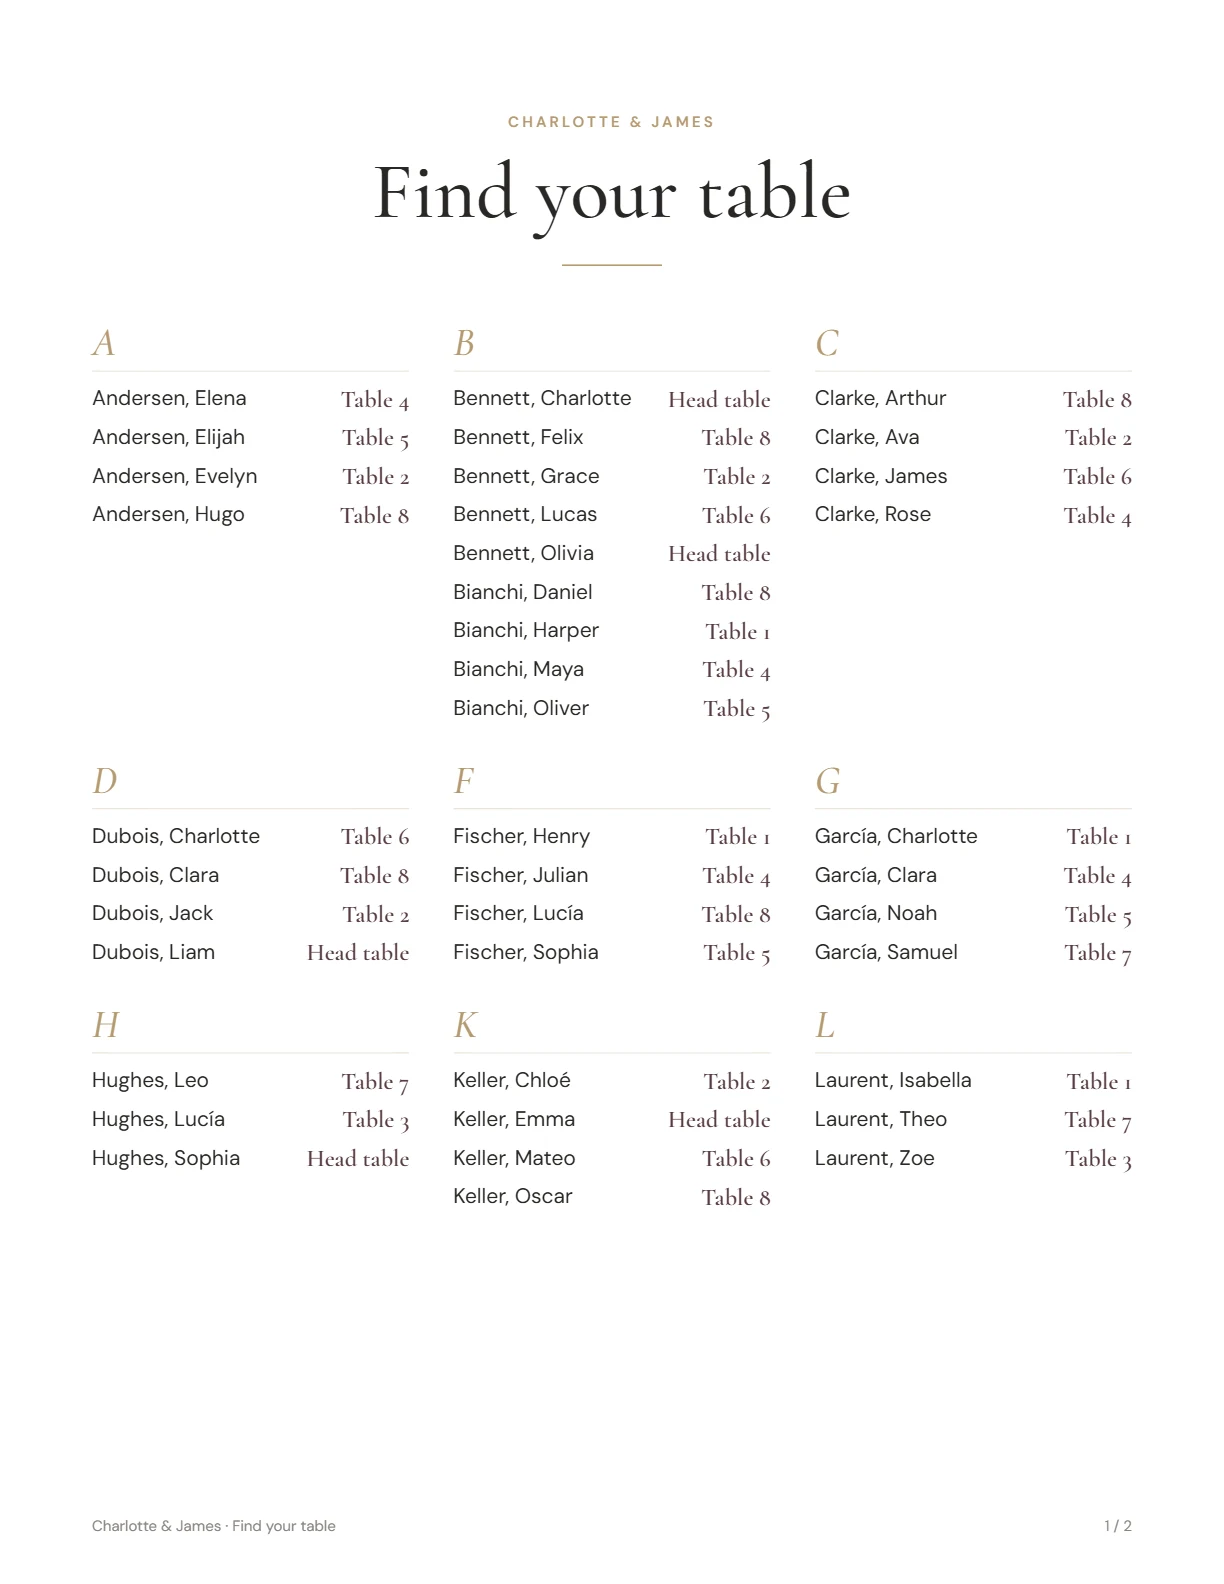
- A “find your table” list at the entrance: guests listed alphabetically by surname, each with their table. It is much faster to read than a chart sorted by table, so lines at the door move quickly.
- The table list with meals, for the caterer: every table, who sits there and what each person eats.
Quick answers
How long does a seating chart take?
With your guests already grouped, a first draft for 100 to 150 guests usually takes an evening. Sorting out the tricky cases and the final changes takes longer, so leave yourself a couple of sessions.
Do I need to assign seats, or only tables?
Assigning tables is enough for most weddings. Assigning specific seats is common at formal dinners and at the head table, and it helps when you have plated meals with different choices, since servers know exactly where each dish goes.
Should I mix both families at the same tables?
Only where it makes sense. Mixing works well for people with something in common, like friends of the same age. Forcing strangers together to “mix” the families usually leads to quiet tables.
Make your seating chart in Seatwise
Paste your guest list from Excel or Google Sheets, drag guests to tables and print the documents your venue needs. Free for up to 50 guests, no sign-up, and your list stays on your device.
Start freeSee how it works